Burning Desire for a New Hobby?
Pyrography, also referred to as wood burning, is the art of decorating wood with a heated metal tool. Very similar to engraving, one will carefully apply the heat from the tool to create designs and lettering directly onto the wood’s surface.
Some things I love about this hobby are how easy it is to get started, the ease at which you can set up and put it away when you’re done, there is very little mess, and I find it to be very relaxing. If this sounds like something you’d like to try, here are some things to get you started:
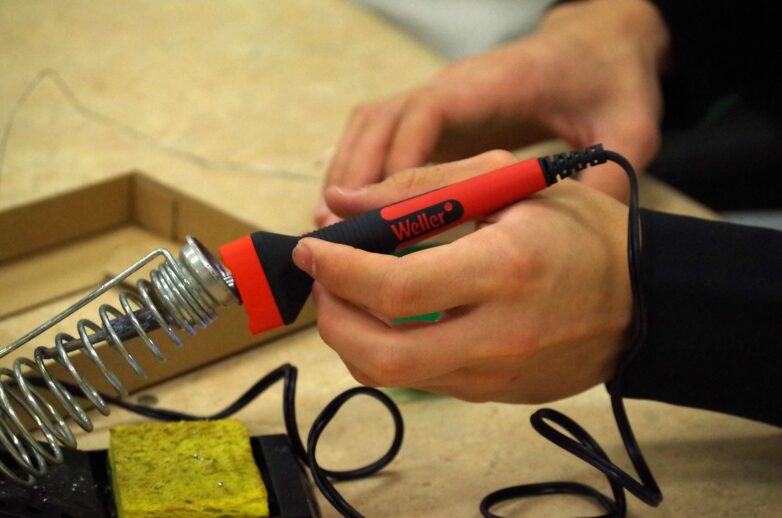
Pyrography Pen:
The first thing you’ll need is a pyrography kit. There are a TON of options ranging anywhere from $10-$15 up to over $100-$200. As with most things, you’ll pay more for better quality tools.
Some features that I look for when purchasing a kit are:
- Find one that comes with a variety of tips. The different shapes give you a lot more versatility when it comes to drawing or shading your work.
- While many people can achieve great results with a standard off/on switch, my preference is a pen that includes variable temperature. I like this because you can set the temperature much lower to build up your shades slowly more easily than one with a fixed temperature setting.
- A stand to set your tool on or in. To me, this is a must have safety feature as you never want to just leave the pen resting on a workspace. The hot end could damage your table, it can fall off the table and burn something, you could grab the wrong end by mistake etc.
There are two styles of pens you can buy, solid tip or wire tip. While both types of pens can achieve excellent results, and the solid tips can hold heat better, my preference is towards the wire tipped models. A few reasons for this are:
- I find them more comfortable to hold as the grip is usually much closer to the tip, which for me, I found to be more like holding a pencil. Solid tipped machines, however, you typically have to hold higher up and it was just more awkward for me, personally, to draw with.
- Speed. I’ve found that the wire tipped machines heat up and cool down much faster than the solid tipped ones. I find this especially useful because when you’re working on something that requires a tip change, you don’t have to wait nearly as long.
- In my opinion, I feel like you can get more detail with the wire tips, but everyone can achieve different results.
My pen is a TRUart Stage 2 wire tip, which has been wonderful and fantastic quality. To learn more about several options and what might be right for you and your budget, read here. Must have supplies: Once you have your pen, there’s really only a few other things you either need or might find helpful to get started:
- Sandpaper or a sander – Sanding is a must. While the wood you purchase may seem smooth, you still will want to sand your wood prior to burning to achieve best results. While there are many opinions out there about how high of a grit to go up to, I find going up to about 400-600 grit works well for me. I use an electric sander while wearing a mask and the process usually only takes a few minutes.
- Wood – Wood is obviously essential to pyrography, but there are some things to remember:
- The wood must be natural and free from any stain or varnish. If you do buy an item that has a finish on it, you MUST sand it completely off and back to a natural state.
- You can NOT burn on MDF, particle board or any other similarly manufactured wood as they will release toxic fumes.
- Green wood. You cannot burn on freshly cut or fallen wood.
- There are some types of wood that are also not ok to burn on so be sure to research anything you plan to use.
- To get started, you can usually find pine and/or basswood at hobby stores or online easily; Both highly used woods to do pyrography on.
The main thing to remember, is think before you burn. It always helps to look it up before you buy and burn just to be safe. I like to keep a list of acceptable woods to refer back to. Here is some information on types of wood you can burn on and their pros and cons.
- A small fan – While the smoke is very minimal, especially if working at low temperatures, I still put up a small fan next to me that can suck the smoke away from my area while I burn. Another popular alternative to a fan is a smoke extractor.
- A mask – Use of a mask during sanding is a must as you do not want to inhale the dust. After that, you will get differing opinions on whether or not people think you should wear them while burning.
- Tip Cleaner – There are a variety of ways to clean your tip of carbon build up. I personally use the wire brush and it works fine, but I would say the most popular choice is the leather strop. For more info, read here. Cleaning your tips will help you to get a better burn because the carbon buildup can prevent the heat from getting through easily.
- Knowledge – Remember, research is key to anything and to keep yourself safe. Before starting any new project, I always read as much as possible to learn what I can or cannot do before doing it and pyrography is no different. Here is one website with safety tips to get you started, but there are plenty of others.
Optional supplies:
When wood burning, you can freehand the designs directly on to the wood with the burner, however, some people prefer to create their designs on paper and then transfer them to the wood so they have a guide. If transferring sounds like a nice option to get started, here are some optional supplies that are easily obtainable:
- Masking tape or painter’s tape for sticking the paper to the wood. These are best because they will peel off easily when you are done.
- Graphite or Carbon Paper – People tend to think graphite paper will erase better from the wood, but I find it a little harder to find. I’ve used carbon paper with nice results, however, if you want to give graphite a try but can’t find the paper, you can always turn over the paper your design is on, cover the back by rubbing pencil lead all over, then taping your design down.
- An eraser – I prefer this, especially if I use carbon paper to transfer my design
- A ruler or T-square
- A finishing product (optional) – Products such as Mineral Oil, Spar Urethane, Marine Varnish etc., can provide a level of protection to your pieces. There is a lot of information out there on finishes such as what works in what environment, what is food safe and so on. Here is one website to get you started on learning more about finishing your pieces, but again, there is a lot of information out there so it’s a good idea to check multiple sources. One thing to note is to avoid displaying your woodwork in direct sunlight as it tends to fade, even if you put a UV protection on it.
There you have it, a good base to get you started, now all it is all about learning how to use the tool and figuring out techniques to use to get the results you desire. Here are a few tips followed by some nice sources for tutorials to get you started:
- Low and slow – One of the tips that I have heard the most from professionals is the term low and slow. Keep your temperature low, and move the tool with a gentle touch slowly. Just remember, it’s best to just take your time and not to rush.
- Turn the wood – You can provide much relief for your hand if you turn the piece you are working on instead of just your hand. This will keep you from burning with your hand in an awkward position.
- If you’re on Facebook, I highly recommend looking for pyrography groups there. I belong to a couple and I have found the people there very helpful and encouraging.
- Get scrap wood – I pick up a few small things of wood to use as scrap. I will use it to touch my tool to before my piece to let out some of the heat but it is also helpful to practice techniques on before going to my project.
- Reference Books – There are quite a few good books out there that provide a lot of information on the art of wood burning. Here are some highly rated ones:
- Tutorials – I’ve found one of the best ways to learn is by watching video tutorials online and there are a TON of them. Here are some channels that people seem to like a lot:
There is a vast amount of information out there regarding the art of pyrography. Hopefully some of these basic items will spark your curiosity to learn more about it and maybe even give it a try!